
Thursday, April 19, 2012
Cookies
Starting to think about cookies. Made some the other day, might share a few recipes if i get them worked out.

Wednesday, October 19, 2011
Pie Part 1, The Crust
I promised you all Pie, and though it took me a little longer I am here to deliver. Cindy Mushet said it best, “If there were a culinary flag, pie would be the central emblem.” Pie is wonderful, people literally jump at the mention of it, songs have been written about it, and John Travolta made a movie about it, more or less.
What is Pie? That’s a stupid question, a pie is a baked dish which is usually made of a pastry dough casing that covers or completely contains a filling of various sweet or savory ingredients. Well that may tell us what pie is, but it doesn’t ell us what Pie Is. Pie Is a lot of different things to a lot of different people (hold on because I’m about to wax philosophical). To some pie is Thanksgiving and the warm treat against the cool of November. To another it could be a memory of a mother, or grandmother. And still to another Pie could be just a means to ice cream. To me pie is late nights in Denny’s watching people play chess and talking about things we’ll never really get around to doing.
Pie ain’t just a dessert neither; savory pies can be the cat’s pajamas. Meat pie, Shepard’s pie, Pot pies, heck quiche is just egg pie. Pie is also not limited by shape; we could do a classic full size pie, a mini pie, a pocket pie, even square pie. But no matter what shape, size or type, pie always starts with one thing, the crust.

Pie crust is probably one of the most fussed over recipes in the pastry world. Everyone has the best recipe in the world, everyone knows just how to do it, and everyone hates everyone else’s. In my reading I have come to devise the Four F’s of Pie Crust. They are Flour, Fat, Fluid, and Flavor. We will take them one at a time.
Flour – The base of the crust, it literally holds everything together. Most people agree that the flour needs two basic attributes, it needs to absorb water well, and it needs the right amount of protein. Basically when it gets wet it needs to not have any dry spots, and form gluten. There is a big fuss over which flour to use, cake, pastry, or AP. That’s is of course up to you, but I say use AP, it does the job and you probably have it already.
Remember that this is baking, and we need to weigh our ingredients, especially flour. Now when it comes to pie dough I just don’t see the need for sifting, that is unless your flour has been pressed or compacted recently. If it has then get some air in there and SIFT. Packed flour can cause dry spots in the dough, and that is not good pie.
Fat – pie crust is flakey because of the melted fats. Each little ball of fat in the dough becomes a flake; it is a wonderful miracle in your oven. Once again a debate here rages on, Butter vs. Shortening. Now I am French trained so I use butter, heck I can’t think of something they don’t use butter on. But here where I live in the south shortening is quite popular. Let’s break it down.
- Butter – Butter is the classic, it brings with it lots of flavor, it browns much better, and clumps better in my opinion.
- Shortening – Shortening has a higher melting point which means more time in the oven and better formed flakes.
Either way you go the secret to choosing your fat is one that stays cold for a long time and comes unsalted. Fats need to stay solid until they reach the oven and keeping them cold is the only way to do it. Also fat has great flavors all it’s own, and will do much to enhance the flavors you add latter to the dough, no need to take a chance of ruining it with salted butter.
Fluid – Fluid is easy, use water. Use very little water. Use cold water. Water turns this whole thing into dough, but too much can ruin a good crust.
Water is my preference, it is safe, it is easy, but it is not the only thing that can be used here. I shutter to tell you this because I don’t want you all running out and trying to make pie with OJ or Vodka. In fact the only successful substitution I know about is Cream Cheese. It makes a great savory pie crust I find works wonderfully in meat and pot pies.
If any of you do try a crush with something other than water, send me a note and tell me about it.
Flavor – Flavor in a pie crust comes mostly in two forms, that’s right, our old friends, salt and sugar. We add them as their own ingredients for control (do you know how much salt is in salted butter?). Both should be used sparingly and are really there to help along the other flavors already in the pie. Heck, sugar doesn’t even need to go into the crust of a savory pie.
So is that it for flavor? NO, not at all; now pie purest will kill me for saying this, but really at this point the sky is the limit. Cinnamon, why not? Chopped herbs, who cares? If I was felling overly ambitious I would get in a little vanilla bean with my water some how.
Assembly
There are basically two ways to go; food processor, which gives quick results, or cutting in, which gives more control and sounds cooler. Both are perfectly legit and not too hard.
To start add all your dry ingredients together, flour, salt sugar. Give a quick mix to combine. Some people chill the dry ingredients to help keep the fats together, I find this unnecessary unless working in a warmer then usual kitchen
Next you will need to add your fat. The fat should be chilled, if working in a food processor it can even be frozen. It also needs to be cut into ½ inch cubes. I find it’s easy to do this with soft butter then chill or freeze it. If using a food processor use one second pulses until the mix looks like crushed crackers and peas. Don’t know what I mean? Go get some saltines, crush them up into a bowl, toss some frozen peas in. we want big flakes small clumps. If using a pastry cutter you will also need a butter knife. I find this method works best in a stainless steal bowl, one much larger then needed to hold the ingredients. Use the cutter’s blades to mix in the butter by cutting straight down to the bottom of the bowl. As you work the butter will build up on the cutter, use the butter knife to remove it and continue cutting until the cracker and peas texture is reached. It is important to limit contact with the butter (or which ever fat you choose) with your hands. Hands are warm and we need the butter solid.

Pastry Cutter
If working in a food processor move the mix to a large bowl at this stage. Now it is time to add the fluid. Add the water a tablespoon at a time, “fluffing” the mix after each addition. I find a wooden spoon good for this, what ever you have is fine as long as it is not your hands. Keep adding until the moister content is right, too little and it will be crumbly, too much and it is sticky or gooey.
How do you know what is enough? Whelp, you use your hands. I know I said not too, but if you are like me your hands are really hot, so I really have to limit their time in the dough, this however is a necessary evil. Grab a clump and give it a squeeze, if it holds together and is moist but not sticky you win. If flour and clumps fall from the mass, it needs more water. If it is too wet or sticks to your hand, sorry muchacho, you have gone too far and all is lost. Kneading in more flour at this point only creates too mush gluten and melts your fats.
Next you lightly flour a work surface and pour out the contents of your mixing bowl onto it. Knead the clumps together to form a cohesive dough, but just barely. 4 to 6 kneads is all it really needs. Once again limit the time you touch it to keep your fats from melting. Form the dough into a ball, give a soft push down to flatten it out a little, and wrap in plastic wrap. Chill for 30 minutes before using. This allows the fats to firm up, the gluten time to relax, and the moister time to reach all the corners of the dough.
At this point you are done, you have a pie crust ready to use now or within the week. But wait there is more, what if your pie were a custard or cream pie, or a quiche? A super flakey pie crust is not the answer, it can take in too much moister from the filling, or brake apart too easily when cut, leaving you with an ugly mess. So we turn to the Mealy Pie Dough.
Mealy pie dough is just like flaky pie dough except we keep cutting after the crackers and peas stage. We ate looking for all crushed crackers. That’s it, the only difference in the preparation. Now be careful not to go too far, when in doubt leave a few pea shaped fat lumps in the dough, it’s ok to have a few.
Is that it then, all there is to putting a pie dough together? NO, there is still more. What if you wanted a Crumb Crust?
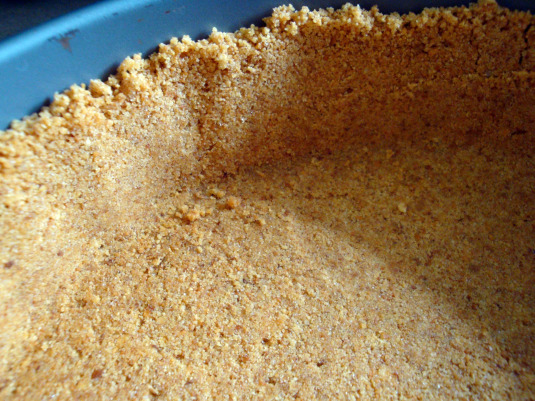
A crumb crust is a mashed together goodness that lines the bottom of some of the best pies and cheese cakes in the world. Traditionally made from graham crackers, one can use anything from ginger snaps to Oreos. Making a crumb crust is easy as, you guessed it, pie.
You need about a cup and a half of finely ground whatever you want, about a table spoon of sugar, and ¾ stick of melted butter. Mix in a bowl and then press into a pie pan. Bake at 350 for 8-10 minutes and Boom, you got a crust ready to be filled.
Are we done now you ask? Yes and no; yes that is all I’m going to tell you, no there is still more. But the more is there for you to discover. Go out and try this, mix it up, get funky, and make some pie.
But wait you are all like, “Hey there was no actual recipe for pie dough in this rant.” And I’m all like, “Yup, that’s right. Go ask your mom or grandma, or weird Aunt Rose for the family recipe.” Pies are a traditional food, recipes rooted in families for generations.

Traditions are important to families!
Go fourth and continue the traditions, and then make add your own twist on it. What’s that, you have no family pie crust recipe? Well that’s what the internet is for silly. I can’t do everything for you.
Monday, June 13, 2011
History, Temperature, and Kolaches
History
It’s time for everyone’s favorite missed named Breakfast Food, Kolaches. Now those of us lucky enough to live in an area with a large Czech or Polish heritage have been eating these little buggers for years and know just how great they are. Sausage and cheese baked right into a bun is what it’s all about in the H Town donut shops. But did you know that those are not Kolaches? They are Klobasneks, a cousin to the true Kolache which is a pastry consisting of semi-sweet yeast dough baked with fillings such as fruits, poppy seed, prunes, and cream cheese, often served open-faced[1]. But here in

Today we are making the Sausage and Cheese verity, so don’t worry if that first paragraph had you worried about your Poppy Seed intake. This recipe starts with a dough I learned in culinary school that I modified and scaled down[2]. To make it, and have it come out great each time I will have a quick lesson on Temperature.
Temperature
In bread production Temperature is key in all stages, and it is all Yeasts fault. If your temperature is too high it kills the yeast, you murderer. If it is too low then your yeast never activates and dies too, also makes you a murderer. There are many ways to control the temp of this dough but we will use Basic Temperature to do it today.
Basic Temperature is a temp given with a recipe that helps you keep your dough the same temp. coming out of the mixer every time[3]. This will give your dough a identical rise and proof time every time, meaning every time you make the dough the yeast is active for the same amount of time, which gives you the same amount of flavor development, which makes it taste the same every time. Out side of a bake shop this has little use except when cooking in a very hot or very cold kitchen.
It goes like this; our Basic Temp for this dough is 60°C/140°F. Now subtract your room Temp. and your flour Temp[4]. from Basic Temp. The difference is what you water temperature should be. If you don’t like going through all that add water around 20C/68F. It’s how I cheat[5]. Let’s get cooking.
The Recipe
· 800 grams AP Flour
· 100 grams HG Flour[6]
· 50 grams Milk Powder
· 500 grams Water
· 20 grams Dry Yeast[7]
· 35 grams Salt
· 60 grams Sugar
· 100 grams Unsalted Butter
· Sausage Links[8]
· Medium or Mild Shredded Cheese
1) Take all those ingredients except for the salt and butter and put them in your mixer. Knead it on low for 5 good minutes. This may cause you mixer some grief, it will be a stiff dough and is tough on the mixer. If your mixer stats to heat up put an ice pack on it, it works. If you are still worried mix it by hand you pansy.
2) Cut the butter into a few pats while all that is mixing. Then dump the salt in and add the butter one pat at a time. Crank that mixer up to Medium speed and let it go for 10 minutes this time. The butter will get mixed in as it also greases the side of the bowl, letting the dough knead easier.[9]
3) Grease a bowl with cook spray and put that dough in it after it finishes kneading. Cover with plastic wrap and let rise in a warm dry place for 30 minutes. Punch down dough and portion and then begin to portion it out with a dough cutter, plastic scraper, or bench scraper. I do mine at about 60 grams, but if you are using bigger sausage you will want larger portions. DO NOT SHAPE PORTIONS; JUST PUT THEM ASIDE IN ORDER OF BEING CUT.[10]
4) After all the dough is portioned take the first one you cut off and begin shaping it. Work from first to last, this gives the dough time to rest so when you shape it is not tough. Here are my sub steps for shaping.
a) Roll dough into a ball quickly, without working too much.
b) Dust counter top with flour, not a lot.
c) Place dough ball and on flour and press down with the area between your first and second knuckles.
d) Dust the top of dough with a little flour and using a rolling pin roll into a rectangle 1 inch longer then you sausage and about wide enough that you think you can roll the sausage up in.
5) Place sausage in shaped dough, and sprinkle in some cheese. Fold in the ends and roll the dough up. Make sure to pinch all seams.
6) Place kolaches seam side down on a greased baking sheet ½ an inch apart from each other in all directions. Cover with a tea towel and let rise for 60 minutes or until doubled in size. Pay attention to size because if it’s cold in your kitchen it might take longer, but if it’s hot it will take less. Preheat oven to 350F.
7) Brush on an egg wash (egg yoke and milk mixed together), and bake till browned perfectly. Baking time will very by oven but for me it’s around 15 to 20 minutes. Remember to rotate tray halfway to ovoid hotspots.
8) Cool in pan for until you can safely remove them to a rack. Eat and enjoy.

That my friends, is basically it. Play with this recipe, make it your own. Add jalapeños, or use bacon, just have fun. I have this idea to use beef, caramelized onions and gruyere for a French dip kolache, but that’s my idea, get your own. I added a bunch of foot notes for my brother Dave’s Birthday, he loves foot notes. Any question, you know where to find me.
[2] Thanks to my friend Diana who helped me do this over the phone and Facebook.
[3] Yeast works best in dough between 75-80F.
[4] Yes, put that thermometer in that pile of flour.
[5] If you liked doing all that Math then you can calculate you own base temp by using this formula. Start with End Temp which would be around 77F. So 77 X 3 =231. Now add Room Temp, Flour Temp, and Mixer Friction Factor which is usually around 25F and subtract from 231. That number will be Basic Temperature. If you want to know your mixers actual Friction Factor do the math found on this page.
[6] Can use Bread Flour
[7] Also called Bread Machine Yeast these days.
[9] If you have a new Kitchen Aid Mixer with the wider bowl add 3 to 4 minutes kneading time. The wider bowl gives it a less friction during kneading.
[10] The dough will need to rest and relax, if you don’t let it, it will be too elastic to shape and roll out.
Monday, June 6, 2011
Root Beer Cake
Root Beer Cake! That's right, I said it, quake with fear! Cake made wit root beer is probably the best cake I could think of. I made this cake for a Cub Scout Cake Auction, it was the last cake sold and it sold for the most money. The sad part is that it sold based almost entirely on my reputation with no real promise how it would taste, especially since it was missing an ingredient, but we'll get to that. First the recipe just as I found it on saveur.com, another great resource.
 Here is my cake covered finished. Turning fondant brown requires kneading in cocoa powder, not the funnest thing. The foam is extra icing I piped out with a Big Star Tip. I had about 30 minuets for cover this cake and decorate it so it was far from the best fondant work I have ever done, but the icing foam let me cover up most of my mistakes.
2 cups butter, plus 1 tsp. to grease pan
2 1⁄2 cups cake flour, plus 1 tbsp. for dusting cake pan
2 1⁄2 tsp. baking powder
1 tsp. salt
1 cup root beer
5 tsp. root beer extract (preferably Zatarain's)
1 1⁄2 cups sugar
4 room-temperature eggs
4 1⁄2 cups confectioners' sugar
2 tbsp. Cream
1. Heat oven to 350°. Grease a 9" × 13" pan with 1 tsp. of the butter; dust with 1 tbsp. of the cake flour; tap bottom of pan to remove excess flour.
2. Sift remaining cake flour, baking powder, and salt into a bowl; set aside.
3. Whisk together root beer and 2 tsp. of the root beer extract in a bowl; set aside.
4. Beat sugar and 1 cup of the butter in a large bowl until fluffy. Add eggs one at a time, beating briefly after each addition. Alternately add flour mixture and root beer mixture, waiting for each to be incorporated before adding the next. Mix briefly, then transfer batter to pan; smooth out top.
5. Bake, rotating once, until a toothpick inserted in the middle comes out clean, about 30 minutes. Let cool
6. Put confectioners' sugar and remaining butter into a bowl; beat with an electric mixer to combine. Add cream and remaining root beer extract; beat to make a fluffy frosting. Spread frosting on cake, making swirls and whorls. Decorate with root beer candies.
Now root beer extract proved hard to find when it came time to make my cake so I just had to do without. It did effect the flavor so I defiantly recommend using it, order it online if you have to, but don't skip it like I did. I tried to make up for it by brushing the cake with root beer before I iced it, it helped some, and kept the cake moist, but did not make up for the lack of extract.
The icing I made with root beer and it came out great. It is important to let it chill in the fridge, so make sure to make it first. This would even be good with just vanilla frosting too, like a float.
The recipe says to serve it with root beer candies, which I think is a horrible idea. Root beer candies are dense and hard, not something you want on top of your cake. For me it would be vanilla ice cream, strawberries, or milano cookies. Think about it.
This recipe was for a sheet cake but just as easy for layers. Mine was 4 layers covered in fondant, not something I suggest everyone try. In fact I think there is a lot to be said for this to be a sheet cake. This cake is fun and different a great cake to serve to guests, and a good way to show off to them too. Who could really turn down a piece of root beer cake?
Tuesday, May 31, 2011
Lemonade Cake
This is a recipe that I found online when searching for recipes based off of my favorite things, lemonade being one of them. Myrecipes.com has been a great resource for me lately and it brought me this little gem. There are actually two recipes for this, cake and icing, both use lemonade concentrate and zest. I find it uses lots of zest so you’ll need a few lemons and don't feel bad about zesting them for the cake, they can always be sliced up to top the cake or squeezed to make lemonade to have with the cake. Now for the recipe as it appears off the web site, I will comment after.

Ingredients
1 1/3 cups granulated sugar
6 tablespoons butter, softened
1 tablespoon grated lemon rind
3 tablespoons thawed lemonade concentrate
2 teaspoons vanilla extract
2 large eggs
2 large egg whites
2 cups all-purpose flour
1 teaspoon baking powder
1/2 teaspoon salt
1/2 teaspoon baking soda
1 1/4 cups fat-free buttermilk
Cooking spray
Frosting:
2 tablespoons butter, softened
2 teaspoons grated lemon rind
2 teaspoons thawed lemonade concentrate
1/2 teaspoon vanilla extract
8 ounces 1/3-less-fat cream cheese
3 1/2 cups powdered sugar
Cake:
Preparation
Preheat oven to 350°.
To prepare cake, place first 5 ingredients in a large bowl; beat with a mixer at medium speed until well blended (about 5 minutes). Add eggs and egg whites, 1 at a time, beating well after each addition. Lightly spoon flour into dry measuring cups; level with a knife. Combine flour, baking powder, salt, and baking soda; stir well with a whisk. Add flour mixture and buttermilk alternately to sugar mixture, beginning and ending with flour mixture; beat well after each addition.
Pour batter into 2 (9-inch) round cake pans coated with cooking spray; sharply tap pans once on counter to remove air bubbles. Bake at 350° for 20 minutes or until wooden pick inserted in center comes out clean. Cool in pans 10 minutes on a wire rack; remove from pans. Cool completely on wire rack.
To prepare frosting, place 2 tablespoons butter and the next 4 ingredients (2 tablespoons butter through cream cheese) in a large bowl; beat with a mixer at high speed until fluffy. Add powdered sugar, and beat at low speed just until blended (do not overbeat). Chill 1 hour.
Place 1 cake layer on a plate; spread with 1/2 cup frosting. Top with remaining cake layer. Spread remaining frosting over top and sides of cake. Store cake loosely covered in the refrigerator.
Ok, to start out the first 5 ingredients are the most important, they set the tone for the cake. Butter and sugar beat together with the elements that flavor the cake. Really let it got for a full five minutes, wait for the butter to really whip up, become lighter in color and take on air. After adding each ingredient let the badder mix well before proceeding and then mix well at the end.
Cake badder can be fickle so don't let it sit around too much, have your pans ready. The recipe calls for cooking spry, usually I recommend coating the pans in melted butter then rolling then in sugar, but not this cake, it works well with the spray. Also the tapping of the pans to work out air is important too, don't skip it.
This cake is a fun template to change it into whatever you want. Use oranges and make an OJ cake, do a lemon lime cake, or use a different concentrate in the icing, say raspberry, and have a pink lemonade cake. Berries in between the layers and on topis also a good way to go. Next time I make this cake it will be topped with berries and mint leaves served with some vanilla ice cream. Refreshing way to end a picnic or outdoor lunch on a summers day.
Here We Go Again
This is what happens when I get board, I start a new blog. Kind of miss having something to update and a real place to share. So now that I am out of school I like to try strange new recipes and apply my knowledge to them. This will be the place where I share those recipes, and my experience with them. Also pictures, and tips and other stuff. So from now on when I announce that I made something and it was amazing, you can know exactly how I did it.
Subscribe to:
Posts (Atom)